
Ortus Regni - Rebellion
Semi-Cooperative, Cooperative or solo play variant against the King.
When you rise against your sovereign lord you risk everything! Your lands and legacy. Perhaps you will succeed? But the die is cast and it is now your fate to topple the crowned head, or fail and be removed from this Kingdom forever.
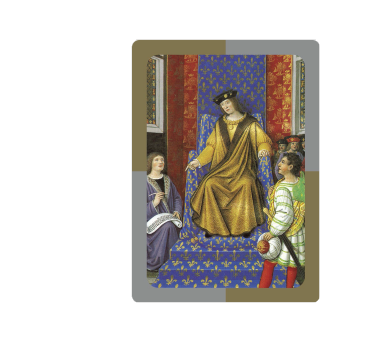
The King
In this variant you face the King of Wessex.
He has nearly endless resources and power at his disposal.
But all is not lost… your relentless and clever efforts, with a little luck, may win a final victory that will echo down the ages. Earls have stood-up to a King before and won.
Semi-Cooperative play
In this mode Earls may not harm each other in any way until the King has fallen. Immediately after the King has been defeated players may interact with each other as if it was a normal game of Ortus Regni.
Until the King falls players may not Attack each other in battle or through Politics.
The Cathedral does not prevent other Earls from Bequeathing, unless it is possessed by the King. And any Church Decides battle result choices (controlled by a player) must be decided in favor of the Earl who is in combat with the King.
But once the King has been defeated… one Earl will rise above the others and claim the Kingdom! The normal victory conditions and rules of Ortus Regni are then in play. The King card itself is then also available, to be claimed by Banners in the normal fashion.
The King is dead, long live the King!
Cooperative play
In this mode the Earls only need to defeat the King. They have then won the day, and peace returns to the land. As in Semi-Cooperative play, Earls may not harm each other in any way during the struggle against the King.
In the aftermath of the rebellion the King’s very young nephew is installed in his place, and the victorious Earls control the Regency and thus the Kingdom until he reaches the age of maturity.
Solo play
It is a bold and dangerous thing to face the King alone; with only your Earldom standing against a Kingdom. But all the other Earls of the land stand aside from the fight, leaving the King alone, perhaps you can succeed?
For the best solo play experience use our free game software application: http://ortusregni.com/software/
Set-up - and altering the King’s Strength
The King is run by a fairly simple mechanism. He starts with:
A basic Earldom set-up.
A number of Towers equal to the number of starting players +1.
- The King Card and a number of un-killable Royal Infantry, indicated with cubes equal to the number of starting players. These represent the nearly inexhaustible levies of men that the King can raise.
- A small deck of selected Earl cards that operates as his Mind.
All items in this scheme can be altered. The easiest and most efficient items to alter are the number of Royal Infantry and the number of Towers the King starts with.
The King’s Earldom
The King starts with a Palace, with a Prince Lord in it, and also with a Castle. The King will also start with a number of Towers out that is determined by the number of starting players +1.
So in a 2 player game the King would start with 3 Towers. The King never places more Towers out, he is overconfident perhaps.
The King’s Royal Forces
King’s main strength is in his Royal Army.
The Royal Army is a permanent force and a perpetual danger to you. It is also a barrier to overcome each time you face the sovereign in battle. The Royal Army includes the King card, which plays normally, and a selected number of Infantry that never die in battle, as he immediately calls up more loyal men to replace his forces.
Place a number of cubes out, of the King’s color, by the King card equal to the number of starting players. Thus in a 2 player - 2 Earl – game, the King’s Royal Army has a force equivalent to 3 un-killable Infantry cards, because he also holds the King card itself (+ the 2 Royal Infantry).
You will always have to field enough forces on the Attack to “get beyond” the Royal Army to do any real damage to the King’s holdings.
When the King creates more forces from within his Earldom, then the rebels may be quickly crushed, so do not tarry and delay too long in your campaign against him.
Setting up the King
The King is placed on the table as if he was a normal player. After you have determined who is starting player (amongst the Earls), the King should be placed to the right of the Vikings, so that he is the last “player” on the table to take his turn before the Vikings.
You are free to experiment with changing any of the above features of the King. You can alter the original Earldom that the King starts with. You can alter the number of Towers that the King has. You can alter the number of the Royal Infantry. You can even alter the composition of the King’s Mind.
We provide our default set-up below for this system and various numbers of players.
King’s Earldom:
- 1 Palace with a Prince Lord
- 1 Castle with no Lord
- Towers equal to the number of players +1. So 2 Towers in a solo game, 3 Towers with 2 rebel Earls, etc.
- King card + cubes of the King’s color equal to the number of players. Thus the King has a force (including the King card itself) of 2 in a solo game, and 3 when facing 2 rebel Earls.
Note that in this scheme the initial number of Towers and the total size of the King’s Royal force will be equal.
The King’s Mind
On the King’s turn the King’s Mind deck is used to determine what he will do that turn. A card from this deck is drawn and acted upon.
This is a special small deck of 11 Earl cards. One full Earl card set is used by the King; one Earl color set.
Each Earl card in his Mind has a special meaning:

3 Champions
Attack an Earl

Treachery
Treachery an Earl
2 Lands
Place a Land card from the King’s tray
Intrigue
Intrigue an Earl
Market Town
Place a Market Town, or Land, from the King’s tray
Monk
The King sends 2 cubes to the Vikings
Castle
Place a Castle from the King’s tray
Vassal
Place that card as a Vassal Lord
Cards drawn from this deck are placed in a discard pile. And when the King’s Mind is depleted then the discards are reshuffled and the King’s Mind is refreshed and used again.
Placing new Properties, Castles and Lords
Whenever the King’s Mind draws a Land card, discard that Mind card into the King’s Mind discards and pull a Land card from the King’s full Earl card tray and place it in his Earldom. Attached the new Land card to the Palace, or with other Lands or Market Towns if available. When the King has no more Land cards in his tray ignore this card.
Whenever the King’s Mind draws a Market Town card, discard that Mind card into the King’s Mind discard pile and pull a Market Town from the King’s full Earl card tray and place it in his Earldom. If the King already has a Market Town, draw a new Land card instead (if he one left in his tray). Attached either new card to the Palace, or with other Lands or Market Towns if available.
Whenever the King’s Mind draws a Castle card, discard that Mind card into the King’s Mind discard pile and pull a Castle from the King’s full Earl card tray and place it in his Earldom. When the King has no more Castle cards in his tray ignore this card.
When the King’s Mind draws the Vassal card, place that card into an available Castle or Palace. This card goes directly into his Earldom and does not return to the King’s Mind discard pile until it is killed. If the King has no available Castle or Palace for the Vassal then ignore this card.
If the King’s Prince Lord is killed then it goes into the King’s Mind discard pile. And it may be drawn later when the King’s Mind is reshuffled. In that case it follows the same placement rules for the Vassal card above.

Prince
(if killed previously) - Place that card as a Prince Lord
Resolving the King’s Choices
Battles
The King always fields all his available forces in every Battle, whether on defense or when attacking.
When the Champion card is drawn from the King’s Mind, the King wants to Attack a rebellious Earl!
- Draw a cube from the Viking bag to determine which Earl the King wants to attack. You should remove all the King’s cubes and set them behind his Earldom for this, and only place them back into the bag for a Viking control draw.
- Then draw a Joust card to determine how they attack:

No Luck Card
The King wants to attack the targeted Earl’s Towers
Joust Deck Vassal
The King wants to Raid the largest Fief in that Earldom
Joust Deck Prince
The King wants to Siege the Palace (or largest Fief ) in that Earldom
The largest Fief in an Earldom is the one with the most cards, including Lord associated with it.
If the desired Attack is not possible - or available - for the King, you shift the target thus:
- Towers > Raid > Siege (stepping inwards)
- Raid > Towers > Siege
- Siege > Raid > Towers (stepping outwards)
A desired Attack is not available if the target does not exist, i.e. if there are no Towers or no Properties to Raid.
A desired Attack is not possible if the King lacks the forces to succeed, i.e. if there are so many Towers that no damage point would reach a Raided property or, similarly, if the required 2 damage points would not reach a Castle or 3 damage points would not reach a Palace.
This calculation ignores whatever forces the defending Earl might field. The King will, for example, attempt to Siege a Palace so long as he can get 3 points beyond any Towers. Thus, the defender in that case would be need to field only 1 defending card to battle the King and foil the attempted Siege, but they would be required to field something to save the King’s target.
Ransoms and Lords
The King is too proud to Ransom any Lords if they are captured. But Earls may send Ransoms to the King to save their Lords. Ransomed properties are usually placed with the King’s Palace, and if that is gone, with the largest Fief in the King’s Earldom. But Lands and Market Towns should always be grouped with other Lands and Market Towns.
Politics
You can attempt to Treachery one of the King’s Lords, or Intrigue any of the King’s Properties.
The King does not have a Hand that you can Treachery, his court is too loyal to defect.
When you attempt a political attack on the King, draw a Joust deck card to determine if he has an Allies card. A Joust Face card (Prince or Vassal) means he has played and Allies card, a No Luck card means he has failed to counter your politics.
If a Political Struggle develops, either when you are using politics on the King or when he is politically attacking you, the King first plays out any Vassal Lords that he possesses. Otherwise, you draw a Joust deck card, as above, to determine if he has a Vassal card available for the struggle. If it is a Face card he has played a Vassal into the political struggle and if it is a No Luck card he has failed to do so. Repeat this if the struggle continues with multiple Vassals on each side!
Thus, all politics against the King is a 50/50 proposition. Or worse, if he has Vassal Lords present. He has many supporters, but they might not save him every time he faces political machinations.
Edge case logic
As an overall policy, when you face a question of how to handle some behavior, or placement for the King, you should err on the side of doing the wisest thing for the King. Simply ask yourself, “what would I do for my own Earldom?” and you will have your answer.
For example, if the King has Intrigued a Land and Market Town combination from an Earl… and he only has two Castles in his Earldom, you should not split up the Land/Market Town combo, but place them both together on either Castle. Or, if the King has two Castles and one has a Vassal while the other has no Lord, Properties should be placed on the Castle without the Vassal. Since they are less threatened by a Treachery card with that placement. Of course, the King’s Mind may later place a Vassal Lord in that empty Castle, but you made the best choice initially, regardless.
Banquet card special rule in semi-cooperative play
In semi-cooperative play - the competitive style of Rebellion - an interesting option is to allow the Banquet card to be a “counter” for any attack or politics coming your way from the King.
In other words, whenever your color cube comes out of the bag for an Attack, a Treachery, or an Intrigue from the King… you can immediately play a Banquet card from your Hand and “appease” the King at that moment. Stopping his aggressive intentions from coming your way, and also cancelling the King’s aggression that turn.
Some might say that you are tricking the King with your munificence, into thinking that you are his loyal friend again. And you are!
Banquet
If your cube is drawn, you can immediately play a Banquet card when targeted by any aggression from the King, this cancels his plans for you.
Banquets do not "appease" Vikings, if the King sends them your way. The Vikings know that they will be feasting at your table anyway, if they are victorious.
This special rule for Banquets seems to work well in semi-cooperative. As Banquets are not the ideal card to have in large numbers usually - but here they can be crucial - while delaying the King’s damage alone will not save the Earls from each other in the end. And the King will still be growing. However, this rule does not work in fully cooperative or solo mode, as it allows Earls to deal with a naive King too easily.
Fold and Play Mat
We have always provided Print-and-Play options for our mats and variant rules. And we think we have come up with an elegant way to add a personal tableau for the King... when there is a Rebellion!
This is a PDF file that you can print out and then fold corner to corner - the long way - to provide the King with a mini mat tableau. This would be placed in front of the King’s Towers and adds a little more decor to your attempt to dethrone him.
On this mat is a location for the King card - which he possesses at the start, of course - and circles to mark however many special Royal Infantry you give him.
Below is an image of the “fold and play” in use.
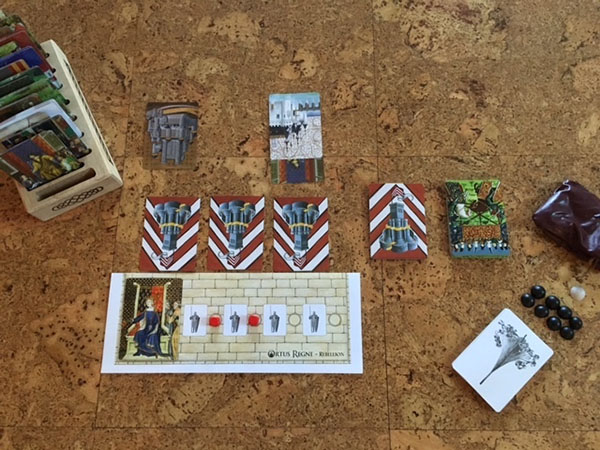
Here you can see the King’s starting condition for a 2 Earl (2 player) game of Rebellion: the King has 2 Royal Infantry, 3 Towers, 1 Palace with Prince Lord, and 1 Castle.
The King’s Mind deck is present (the small deck to the right) and the Joust deck is nearby to facilitate use. Finally, the King’s oak tray is nearby so that Lands, Castles or the Market Town can be plucked out and added to his Earldom, if the King’s Mind pulls any of those cards. Note also that the King has been placed to the right of the Vikings; so he is last in the turn order.
Gameplay Notes:
The power of the Royal Army is the key force on the table.
This permanent force is both devastating in repeated battles with it, and troublesome when you are trying to damage the King.
Even when the King is on his last legs this Royal Army ensures that he is dangerous.
If the King is allowed to mobilize forces from within his own Earldom it will quickly look like the rebels made a terrible error by challenging their sovereign.
It is important to take his Towers down as soon as you can. He will not rebuild these, so it gives you a chance to start attacking his Fiefs.
Politics against the King is certainly a tricky business, since he might always win such a conflict. But being able to occasionally take out a Prince or Vassal Lord, or steal a couple of Lands, can really change the fate of the Rebels.
Honor amongst the rebels will vary by game mode. Even in fully cooperative play, Earls may hesitate to risk their own precious assets and hope to convince another Earl to fight their battles for them. An Earl never likes to fall on their sword, only to see others survive the struggle.
While in semi-cooperative play things get really interesting, because you will face each other when the King falls! Thus you face a “Prisoners’ Dilemma” of sorts. Do you expend your strength helping to defeat the King? Or do you hold back, maybe ensuring that all the rebels are eventually crushed by the growing power of the sovereign?
In semi-cooperative play it is not at all unusual to see the King win, crushing the bickering Earls.